Your Success Begins with Quality Training and Education phone(615) 924-3600
GD&T Specialists
  index about training public workshops store contact  


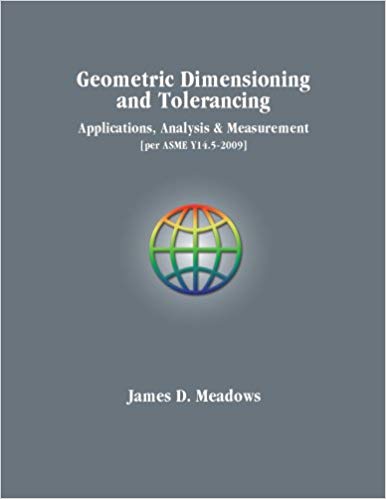
GEOMETRIC DIMENSIONING AND TOLERANCING

Applications, Analysis & Measurement [per ASME Y14.5-2009]

  James D. Meadows
© March, 2009
574 pages, hardcover, illustrated
ISBN: 0-9714401-6-6
Publisher Price: $129
Geometric Dimensioning and Tolerancing – Applications, Analysis & Measurement [per ASME Y14.5-2009] is based on the ASME Y14.5-2009 Dimensioning and Tolerancing Standard.

Co-published by ASME, this textbook reflects new symbology, rules and basic principle revisions that took the Y14.5 committee almost 15 year to complete. It shows how to interpret design drawings and CAD representations of product definitions that use the ASME Y14.5-2009 standard. It also explains step-by-step procedures to apply the new Y14.5-2009 practices and allows dimensioning and tolerancing professionals to express their design requirements more clearly. The results are that: production representations are able to be more specific in conveying tolerancing needs, products can be more easily manufactured, and appropriate inspection techniques are clarified.


This is one of the most comprehensive GD&T textbooks ever written by a single author. Some of the concepts covered in this text are:

   
  • All of the new symbols, rules and principles instituted by the ASME Y14.5 - 2009 Standard

  • Basic GD&T

  • Advanced GD&T

  • Tolerance Stack-  Up Analysis

  • Statistical Tolerancing

  • Inspection Techniques and Sources of Measurement Uncertainty

  • Gage and Fixture Design

  • Tolerancing Mating Parts and Assemblies

  • Analyzing and Correcting Interferences, Imbalance in Rotating Parts and Material Strength Problems due to Insufficient Wall Thickness

 
Textbook Contents:
1 Symbols, Rules, Charts
- Geometric Characteristics
- Symbols
- New Symbols
- Old Symbols, New Meanings
- Charts- Food Chains of Symbology
- A Few Basic Definitions, Formulas and Guidelines
- New Rule Regarding the Use of Regardless of Feature Size
- Maximum Material Boundary, Least Material Boundary and
Regardless of Material Boundary
- Actual Minimum Material Envelope vs. Actual Mating Envelope
- Flatness of the Derived Median Plane
- Types of Controls
- Tolerances
- General Rules for Tolerances

2 Selecting a Tolerancing Approach
- Datums and Datum Features
- Defining, Tolerancing and Qualifying Datum Features
- Fixed Fastener Assembly Tolerancing Formula
- Simultaneous Requirement Rule
- Reading a Feature Control Frame

3 Datum Feature Simulators and True Geometric Counterparts
- Datum Feature Simulators: and True Geometric Counterparts
- Fixtures, Gages and Virtual Condition Boundaries

4 Boundaries and Material Condition Symbols, MMC, LMC & RFS
- Dimensioning and Tolerancing Overview
- Rule #1: Size Tolerance and Form Tolerance are Interdependent
- Exceptions to Rule #1
- Principle of Independency Symbol
- GO Gages
- Brief Comparison of Concentricity, Circular Runout, Total Runout
and Position Tolerancing
- Introduction of Orientation on Mating Parts
- Material Condition Symbols and Concepts Explained
- Regardless of Feature Size
- Least Material Condition
- Maximum Material Condition
- Inner and Outer Boundary Calculations

5 Major Concepts of Geometric Dimensioning and Tolerancing
- - Converting from Plus and Minus Tolerance to Geometric Tolerance
- Position
- Profile
- Selecting Datum Features
- Size Tolerance Controls Form Tolerance (Rule #1), GO Gages
- Flatness
- Perpendicularity
- Mating Part Tolerancing
- Reading the Feature Control Frames as a Language
- Functional Gages
- Calculating Inner and Outer Boundaries
- Virtual Condition
- Resultant Condition
- Practical Absolute Gage Tolerancing
- Bonus Tolerancing Formulas
- Allowed vs. Actual Deviation from True Position Calculations
- Conversion Chart Inches
- Conversion Chart Millimeters
- Tolerance Zone vs. Boundary Verification
- Another Difference between Bonus Tolerance (Growth) and Datum Shift
(Movement) of Tolerance Zones

6 Form
- Flatness
- Straightness
- Cylindricity
- Circularity (Roundness)
- Spherical Diameters Controlled with Circularity
- Average Dimensions

7 Orientation
- Parallelism
- Parallelism of a Tangent Plane
- Perpendicularity
- Angularity
- Angularity of a Tangent Plane
- Angularity as a Refinement of Position
- Shifting vs. Growing Tolerance Zones

8 Profile
- Profile of a Surface
- New Symbol for Unequal or Unilateral Profile Tolerancing
- NONUNIFORM Profile
- Dynamic Profile
- Profile of a Line
- The Power and Versatility of Profile (Mating Parts)
- Tolerancing Mating Part Profiles
- Composite Profile
- Composite vs. Two Single Segment Profile Controls
- Profiling Patterns of Features Using 3 Levels of Profile Tolerances
- Coplanarity
- Continuous Feature of Size Symbol
- Dimension Origin Symbol
- Locating Offset Surface with Profile of a Surface
- Conicity

9 Runout
- Circular Runout
- Total Runout
- Comparison of Perpendicularity and Total Runout on a Planar Surface

10 Concentricity and Symmetry [per ASME Y14.5- 2009]
- Concentricity
- Comparison of Coaxiality Controls
- Symmetry
- Symmetrical Part Symbol

11 Datums
- How They are Selected and What They Mean
- Specifying Degrees of Freedom
- Datum Feature Simulation
- Designating Degrees of Freedom on the Part Drawing
- Establishing a Valid Datum Plane
- Effects of Differing Datum Precedence on Part Acceptance
- Curved Surface as a Datum Feature
- Conical Datum Features
- Datum Feature Pattern Referenced Regardless of Material Boundary
- Inclined Datum Feature
- Constant Cross- Sections and Complex Datum Features
- Specifying Degrees of Freedom in the Feature Control Frame
- Multiple Datum Reference Frame Identification
- Correct Material Boundary Size Specified Next to the Datum Feature
- Correct Material Boundary Calculations
- Using the Translation Modifier
- Basic or BSC Spelled Out in a Feature Control Frame
- Planar Datum Feature Simulated at Regardless of Material Boundary (RMB)
- Planar Datum Feature Simulated at Maximum Material Boundary (MMB)
- Offset Datum Features of Size Simulated at RMB and MMB
- Profiled Datum Features Simulated at RMB and MMB
- Irregular Datum Features of Size
- Repetitive Patterns

12 Centerplane Datums
- An Overview
- Centerplane Datums on Mating Parts in a Fixed Fastener Assembly
 

13 Position with Fixed Fastener Assemblies and Projected Tolerance Zones
-Tolerancing Mating Parts in a Fixed Fastener Assembly
-Projected Tolerance Zones and How they are Measured
-Datum Feature Shift/Pattern Shift
-Alternate Method Using Chain Lines to Show Projected Tolerance Zones
-Calculating Clearance Hole Sizes Needed Without Projected Tolerance Zones

-Alternate Method Using Chain Lines to Show Projected Tolerance Zones


14 Tolerancing Mating Parts in a Floating Fastener Assembly
-Floating Fastener Assembly Condition (Radial Hole Patterns)
-Assigning Datum Features to Mating Parts with Radial Hole Patterns
-Calculating Position Tolerance
-Two Single Segment Position Tolerancing
-Calculating Minimum Wall Thicknesses
-Accumulative Datum Shift on Mating Parts in an Assembly
-Tolerance Zones and Their Movement with Two Single Segment Position


15 Direct vs. Indirect Relationships
-Overview
-Tolerancing Mating Parts Holding Function Directly and Indirectly
-Switching Datums in Mid-Stream
-Unique Effects of Utilizing the LMC and LMB Concepts
-Wall Thickness Calculations


16 Datum Targets
-Flexible Parts, Datum Targets and Partial Datum Features
-Sheet Metal Panels and GD&T Sheets
-Equalizing Datums
-Moveable Targets, Finding the Datum Planes and Fixturing

-Vector Symbols
-Datum Target Symbols for Spherical Diameters
-Centerplane Datums
-Spherical Tolerance Zones


17 Datum Feature Scheme Choices
-Datum Feature Patterns and Profile
-Simultaneous Requirements
-Compound Datum Features of Size
-Secondary and Tertiary Datum Features of Size
-Finished Machining Requirements for a Cast Part


18 Flexible Parts
-Flexible Parts and Inspecting Them in the Way They Work
-Temporary Datum Features
-Common Misconceptions
-Free State Variation in Sheet Metal Parts
-Specifying Restrained State Inspection
-Fixturing Sheet Metal Parts
-Profile ALL OVER Controls and What They Mean


19 Position Boundary Concept
-Position Boundary
-Elongated Holes
-Functional Gages and Virtual Condition Boundaries
-Tolerancing Hoses, Pipes and Tubing with Positional Boundary
-Tolerancing Oddly Configured Features with Positional Boundary
-Oddly Configured Datum Features and How to Represent them in Gages
-Tolerance Zones vs. Boundary Concept Explanation
-Rectangular Tolerance Zones for Round Holes
-Bi-directional Position Tolerancing, Polar Coordinate Method


20 Why Use GD&T
-Multiple Interpretations of Simple Plus and Minus Tolerances
-Converting from Plus and Minus to Composite Position Tolerancing
-Calculating the Position Tolerance for a Composite Position Control
-Minimum Wall Thickness Calculation for Composite Position Tolerances
-Composite Tolerancing for Coaxial Hole Patterns
-Minimum Wall Thickness Calculations for Coaxial Hole Patterns
-Composite Position Tolerancing with 3 Levels of Control
-Differentiating Between Features of Similar Size and Shape


21 Composite vs. Two Single Segment Positional Tolerancing
-Composite vs. Two Single Segment Positional Tolerancing
-Similarities
-Differences
-One Level Tolerancing vs. Composite Tol. and Simultaneous Requirements
-Two Single Segment Position Controls
-Refining Geometric Controls to be More Cost Effective

22 Dimensioning and Tolerancing of Gages
-Dimensioning and Tolerancing of Gages per ASME Y14.43-2011
-GO Gages
-NOGO Gages
-Functional Gages
-Calculating to Determine Good Parts Rejected or Bad Parts Accepted
-Steps in the Development of a Dimensional Inspection Plan


23 Tolerance Stack-Up Analysis
-Tolerance Stack-Up Analysis for a Fixed Fastener Assembly
-Rules
-Calculating Gaps; Working the Route
-Calculating Inner and Outer Boundary Means and Their Tolerances
-Plugging the Numbers into the Number Charts
-Calculating Statistical Tolerancing
-Root Sum Squares
-Bender Factor
-Reintegrating the Statistical Tolerancing into the Assembly
-A Simpler Way to Reintegrate the Statistical Tolerance
-More Statistical Formulas and Symbols
-Glossary of Statistical Terms


24 How to be Specific in Calculating and Specifying Statistical Requirements
for size and Geometric Tolerancing
-Some Useful Definitions When Geometric Tolerances are Used
-Symbology for SPC Formulas
-Arithmetic Mean; Normal Distribution of Tolerance and the Standard
Deviation; Statistical Probability for Tolerance Stack-Up Analysis for
Positional Geometric Tolerances
-Calculating a Standard Deviation
-Predicting the Amount of Tolerance to be Consumed by Manufacturing
-Charts and Tables


25 Tolerance Stack-Up Analysis in a 5-Part Assembly
-Determining a MIN GAP in a Rotating Assembly
-Factors vs. Non-factors
-Alignment
-Dealing with Threaded Features
-Calculating the Pertinent Numbers
-Simplifying the Assembly Drawing
-Creating a Line Graph with Numbers to Calculate the Minimum Clearance
-Adding the Negative and Positive Designations
-Wall Thickness Calculations and Choosing the Pertinent Tolerances
-Single Part Analysis
-Using Profile Tol. and Separate Requirements for Accumulated Error


26 Tolerance Stack-Up Created during Manufacture due to Changing Set Ups
-Where the Tolerance Accumulation Comes From
-Proportions and Trigonometry


27 GD&T as a Language
-To Properly Read a Drawing
-Reading the Feature Control Frames as Sentences
-Profile
-Tolerance Zones and Pattern Shift Zones
-Reading Two Single Segment Controls
-Using Gages to Visualize a Geometric Tolerance’s Meaning
-Reading a GD&T Sheet
-Optional Tolerancing Approaches for Similar Results
-Gears
-Pattern Shift, Where it Comes From and How it Effects the Workpiece
-Bonus Tolerance, Virtual Condition and Zero Positional Tolerances
-Threads, Gears and Splines
-Sequential Tolerancing Using the Simultaneous Requirement Rule


28 Definitions 

If you have any questions about GD&T training, books, workbooks, tests or DVDs,

please reach out to James D. Meadows & Associates, Inc., at (615) 924-3600. 


© 1997 -   James D. Meadows & Associates, Inc., ALL RIGHTS RESERVED Site Design & Maintenance by VIRTUAL GOLDMINE